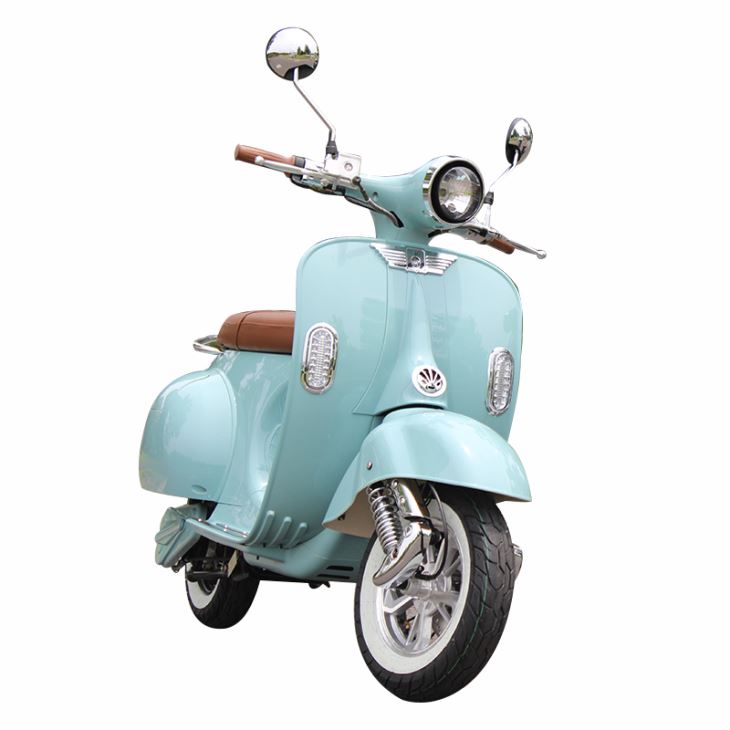
 America’s #1 Retro Electric Moped • Removable Battery • Free Delivery • From $94/mo • Street Legal
How to Build Your Dream Custom Electric Bike: Tips and Inspiration
There’s something magical about riding a bike that’s been tailored exactly to your vision. It’s not just a bike; it’s an extension of your personality, a product of your creativity, and your ticket to eco-friendly freedom. Building a custom electric bike is a journey that combines technical know-how, personal flair, and a dash of ambition. Whether you’re craving more speed, better range, or a design that turns heads, crafting your dream e-bike is entirely possible. Here’s how to get started, plus some inspiration to keep your wheels turning.
Start with Your Vision
Before diving into components and tools, you need to ask yourself a simple question: What do I want from my electric bike?
Is it a daily commuter designed to tackle traffic? A rugged adventurer ready for off-road challenges? Or maybe it’s a stylish cruiser that oozes charm while gliding along the beach boardwalk. Your intended use will shape almost every decision, from frame design to battery power.
Jot down your goals, sketch your ideas, or even create a digital mockup. A clear vision keeps you focused and helps prioritize what matters most.
Choose the Right Frame
The bike frame is the foundation of your project, so picking the right one is essential. While you can build an e-bike from scratch, most people prefer to start with a regular bike frame and adapt it. Here’s what to consider:
Material:
Aluminum frames are lightweight and affordable, while steel offers unmatched durability and a smoother ride. If you’re after something ultra-light, carbon fiber is an option, though it can be expensive.
Design:
Think about geometry. A relaxed frame is better for leisurely rides, while aggressive designs suit speed demons and mountain riders. Ensure there’s enough space to mount your battery and motor without making the setup look cramped.
Compatibility:
Check the frame’s dropout width, bottom bracket size, and mounting points to ensure they’ll accommodate your chosen motor and battery.
Picking the Perfect Motor
The motor is the heart of your e-bike, so this decision deserves some careful thought. You have three main types to choose from:
Hub Motors:
These are mounted in the wheel (front or rear) and are perfect for beginners because they’re easy to install. Hub motors are great for flat terrain and casual riding but can struggle on steep hills or off-road trails.
Mid-Drive Motors:
Positioned at the crank, mid-drive motors offer better weight distribution and are excellent for climbing hills or handling rough terrain. They’re a bit trickier to install but deliver superior performance.
Friction Drive Motors:
These are less common but super lightweight. They’re mounted on the tire itself and are ideal for minimalists. However, they’re not as powerful or efficient as hub or mid-drive motors.
When choosing motor power, consider local regulations. In most areas, 250W is the legal limit for street use, but higher wattage motors (500W, 750W, or even 1,000W) provide more torque and speed.
Battery Basics
The battery determines your range, power, and how often you’ll need to recharge. Here’s what you should know:
Voltage and Capacity:
Voltage (measured in volts) impacts how fast your bike can go, while capacity (measured in amp-hours, or Ah) affects range. A 36V 10Ah battery is a good starting point for casual riders, while 48V 15Ah or higher suits those who crave speed and distance.
Mounting Options:
You can mount the battery on the downtube, seat post, or even in a backpack for ultra-light setups. Just ensure it’s secure and balanced.
Chemistry:
Lithium-ion batteries dominate the market thanks to their excellent energy density and lifespan. Look for one with a high number of charge cycles for better long-term value.
Controller and Display
The controller is your bike’s brain, managing the flow of power between the battery and motor. It’s often paired with a display on your handlebars, which shows speed, battery life, and other stats.
When selecting a controller, ensure it’s compatible with your motor and battery in terms of voltage and current. Some controllers come with advanced features like regenerative braking or customizable settings, which can elevate your riding experience.
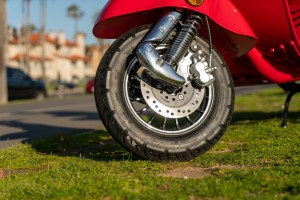
Tires and Wheels
Your choice of tires will dramatically affect your bike’s performance. Consider the following:
Width:
Wider tires provide better stability and grip, ideal for off-road or snowy conditions. Narrower tires are faster and more efficient for city riding.
Tread Pattern:
Smooth treads are best for paved roads, while knobby tires excel on dirt and gravel.
Wheel Size:
Most e-bikes use 26-inch or 27.5-inch wheels. Larger wheels roll over obstacles more easily, while smaller ones are more agile.
Invest in sturdy, double-walled rims and heavy-duty spokes to handle the added weight of the motor and battery.
Adding Personal Touches
This is where your bike stops being “just another e-bike” and becomes uniquely yours. Here are some ideas to make it stand out:
Custom Paint Job:
Go wild with colors or patterns that reflect your personality. Powder coating is a durable option if you want something long-lasting.
Lighting:
Add LED strips or integrated headlights for safety and style.
Accessories:
Think about cargo racks, panniers, fenders, or even a phone mount. Don’t forget a comfy saddle and ergonomic grips for longer rides.
The Build Process
Now comes the fun (and slightly challenging) part: assembling your dream ride.
Step 1: Gather Tools and Parts
You’ll need basic bike tools (wrenches, screwdrivers, etc.), plus any specialized tools for your components. Lay everything out before starting.
Step 2: Modify the Frame
If your frame needs adjustments, like drilling mounting holes or welding brackets, handle this first. Be precise—small mistakes can lead to alignment issues.
Step 3: Install the Motor
Follow the manufacturer’s instructions carefully, especially for mid-drive or hub motors. Double-check alignment and secure all fasteners.
Step 4: Mount the Battery
Ensure the battery is well-protected and accessible for recharging. Use sturdy brackets or straps to keep it in place.
Step 5: Wire It Up
Connect the motor, battery, and controller. Take your time with this step, as wiring errors can cause malfunctions or even damage components.
Step 6: Test Ride
Before hitting the road, do a quick test ride in a safe, open space. Check for smooth acceleration, braking, and handling.
Troubleshooting and Fine-Tuning
Building a custom e-bike is a learning process, and you might hit a few bumps along the way. Here are some common issues and solutions:
Battery Draining Too Fast: Check for loose connections or ensure your battery capacity matches your riding style.
Motor Overheating: This can happen with prolonged hill climbing or underpowered motors. Consider upgrading to a more powerful motor or reducing load.
Controller Malfunctions: Double-check wiring and settings. Some controllers have diagnostic modes to pinpoint problems.
The beauty of building a custom e-bike is that it’s never truly finished. You can always upgrade components, tweak the design, or experiment with new tech. Join online forums or local riding groups to connect with like-minded enthusiasts. Their ideas and experiences can spark your creativity and keep the passion alive.
Remember, your bike is a reflection of you. Whether it’s built for speed, comfort, or style, every choice you make contributes to a ride that’s uniquely yours. So, grab those tools and start building—the road ahead is yours to explore.