 America’s #1 Retro Electric Moped • Removable Battery • Free Delivery • From $94/mo • Street Legal

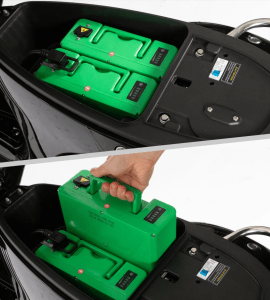
How to Add an Extra Battery to Your Electric Scooter for Longer Rides
You’re cruising down the street on your electric scooter, the wind is perfect, and you’ve got your favorite playlist pumping. But just as you’re about to take that scenic detour, the dreaded low battery warning pops up. Sound familiar? That sinking feeling of having to cut your adventure short—or worse, push your scooter home—can make any rider rethink their setup. The solution? Adding an extra battery for those extended rides. It’s not as complicated as it sounds, and with a bit of planning, you can double your range and reclaim your freedom on the road.
Why Add an Extra Battery?
Electric scooters are great for short commutes and casual rides, but their range can feel limiting if you’re someone who loves exploring, runs multiple errands in one trip, or simply wants to worry less about running out of juice. Sure, upgrading to a scooter with a higher range is an option, but it’s also a costly one. Adding an extra battery, on the other hand, is a more budget-friendly and customizable way to enhance your ride.
Adding a second battery doesn’t just give you more range; it also adds flexibility. You can plan longer routes without obsessively mapping out charging stations or lugging around a charger. Plus, there’s something satisfying about knowing you’ve tinkered with your ride to make it even better.
What You’ll Need to Get Started
Before diving into the nitty-gritty of installation, it’s important to understand what’s involved. Adding a second battery isn’t a one-size-fits-all project—it depends on your scooter’s design, the type of battery you choose, and how you plan to connect everything. Here are the main components to think about:
Compatible Battery:
The extra battery needs to match your scooter’s voltage and chemistry (like lithium-ion). Check your scooter’s specs to ensure compatibility.
Connection Method:
Most setups require either a parallel connection (to extend range) or a separate switch to toggle between the original and extra battery.
Battery Housing:
You’ll need a secure place to mount the second battery. Options include a backpack, under the deck, or a custom bracket.
Wiring and Connectors:
Quality wires, connectors, and possibly a battery management system (BMS) are crucial for safe and efficient operation.
Planning Your Setup
Step 1: Check Your Scooter’s Specs
Start by taking a close look at your scooter’s user manual or technical specifications. Find out the voltage and amp-hour (Ah) rating of the current battery, as well as the type of battery used. Matching these specs is crucial to avoid damaging your scooter’s electronics or causing performance issues.
Step 2: Choose the Right Battery
Once you know the specs, look for a second battery with similar characteristics. Many riders prefer lithium-ion batteries because they’re lightweight and reliable. The capacity (measured in Ah) determines how much energy the battery can store, so go for a capacity that meets your needs without being overkill.
Step 3: Decide on Mounting Location
The mounting spot for your new battery depends on your scooter’s design and your comfort level. If you have a sturdy deck with enough clearance, you might be able to mount the battery underneath. For scooters with limited space, a frame-mounted option or carrying the battery in a backpack could work better.
Keep in mind that mounting adds weight, so consider how this might affect your scooter’s handling. A low center of gravity helps maintain stability, so under-deck mounting is often ideal if feasible.
Step 4: Plan the Connection
There are two common ways to connect an extra battery:
Parallel Connection:
This involves connecting the second battery directly to the existing one, effectively doubling the capacity and range. It’s a popular choice but requires careful wiring and possibly a diode to prevent reverse current flow.
Switchable Setup:
This method uses a switch to toggle between the original and second battery. It’s simpler to implement but doesn’t combine the batteries’ capacities.
Each method has its pros and cons. A parallel connection offers seamless operation but requires precision. A switchable setup is easier but less efficient since you’re only using one battery at a time.
Installation Steps
Step 1: Gather Your Tools and Parts
You’ll need basic tools like a screwdriver, wire cutters, electrical tape, and possibly a soldering iron. For safety, have insulated gloves and a multimeter to check voltages and connections.
Step 2: Test the New Battery
Before installation, test the second battery to ensure it’s working properly. Use a multimeter to check the voltage and confirm it matches your scooter’s requirements.
Step 3: Wire the Connection
If you’re going for a parallel setup:
Connect the positive terminal of the new battery to the positive terminal of the existing battery.
- Do the same with the negative terminals.
- Use appropriate connectors, and consider adding a fuse or circuit breaker for protection.
For a switchable setup:
- Install a toggle switch between the two batteries.
- Wire each battery to the switch, ensuring proper polarity.
Step 4: Secure the Battery
Mount the second battery securely in your chosen location. Use straps, brackets, or adhesive mounts to keep it stable. Double-check that it won’t interfere with your scooter’s moving parts or affect balance.
Step 5: Test the System
Turn on your scooter and check the voltage readings. Take a short test ride to ensure everything works as expected. If you notice any performance issues, revisit your connections or consult an expert.
Tips for Success
Safety First:
Always wear insulated gloves when handling batteries, and avoid short circuits by carefully managing wires.
Balance Matters:
Uneven weight distribution can affect handling, so choose your battery’s mounting spot wisely.
Maintenance Counts:
Regularly inspect connections and keep your batteries charged to prolong their lifespan.
Is It Worth It?
Absolutely. Extending your scooter’s range with an extra battery can open up a world of possibilities. From exploring new routes to skipping the anxiety of low battery alerts, the benefits far outweigh the initial effort. Plus, it’s a fun way to learn more about your ride and make it truly your own.
If the idea of tinkering feels overwhelming, remember that many riders have successfully done this upgrade with a bit of research and patience. Start small, plan your setup, and enjoy the satisfaction of a scooter that keeps up with your sense of adventure.